Weekly Updates
Week One
We were introduced to the project and learned basic CAD skills using Autodesk Fusion 360. Nearing the end of the week, we formed our group and began discussing our next steps. We brainstormed project ideas centered around the question of how this apparatus could make our lives easier during the quarantine.
Week Two
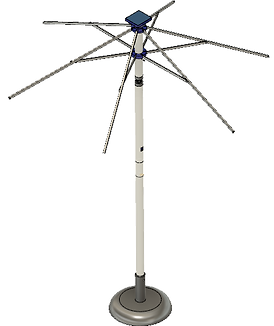
During this week, we improved our skills in Autodesk Fusion 360 through tutorials like creating a Formula SAE steering wheel. We also decided on a topic for our project. Our proposal will be about a portable and multifunctional sun umbrella. It is relevant since people are often outside due to the improving weather. This week also marked the beginning of our website as we created the "About Us" and "Weekly Updates" pages.
Week Three
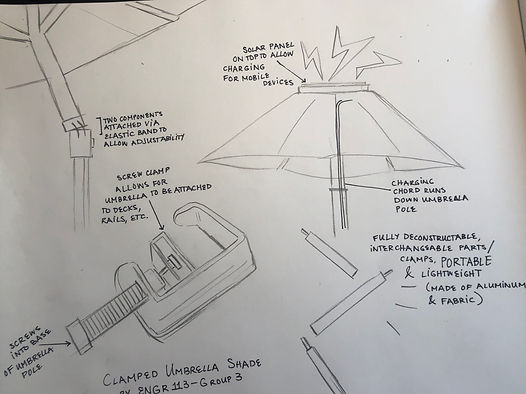
We worked practiced utilizing moving parts in Fusion 360 during class. Since we decided to base our project on an umbrella and already had some ideas, we met to narrow them down and make diagrams of the different possible features. Some segments are drawn, in Fusion 360, or pictures of ideas and goals. This was done to cement the various plans we had and to see how viable they are.


Week Four
This week, we went into more detail developing the components of the umbrella and how they would interact with each other. This includes more research and preliminary modeling of 3D parts. We also had to complete and present our project proposals in which outlined the goals and expectations for our project.
Week Five
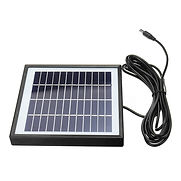
For this week, we focused more on the solar panel and power bank as we decided on the type we would use. This includes considering the power output, dimensions, and weight of the combined electronics. We decided to use a flat solar panel centered at the top of the canopy with the proper output to charge a small electronic device (phones, tablets, etc.), but not large to be intrusive.

Week Six
The designs of the components were smoothed out in preparation for testing and evaluation. We changed the joint location and function, which will now be a hinge joint rather than a ball and socket joint. Also, we finalized an outline for the connection of the two different bases to the pole.


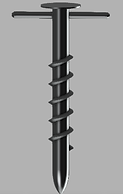
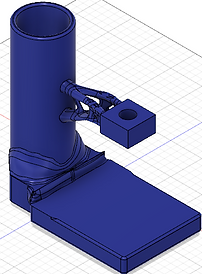
Week Seven
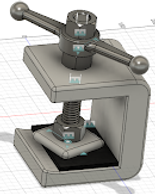
For this week, we split up the CAD modeling, resulting in the creation of the clamp, flat base, and screw base models. We discussed more detail about the required simulations, including the type, location, and magnitude of the loads applied to the components.

Week Eight
This week we scaled the various CAD models to fit within the 3in x 3in x 3in maximum dimensions of the 3D printer. We also completed the 3D printing forms in order to print the prototypes. We also conducted a static stress simulation for the clamp to determine whether it is a feasible idea. Given that there was a high safety level for the clamp, shape optimization was conducted to make it strong but lighter.


.png)
Week Nine
The CAD models we are prototyping were printed remotely at Drexel University and will be shipped later to one of the team members. Those parts include the top joint, bottom joint, screw base, and middle ring. We chose the top and bottom joint to determine whether the joint can successfully function with PLA material as it shows a large part of the umbrella's movement. The screw base is being printed to ensure it prints properly without any support material, and the middle ring is being printed because it is a central piece of the entire umbrella. We want to confirm that it is durable and reliable. We are also preparing for the final report and online video presentations.


Week Ten
As this was our final week, we have been preparing for our presentation and completing our final report. This involved condensing the information gathered and used to formulate a cohesive report for others to learn about our product and prototyping process. We all have deeply enjoyed this process of designing and creating and we hope to convey our hard work and passion for this project.